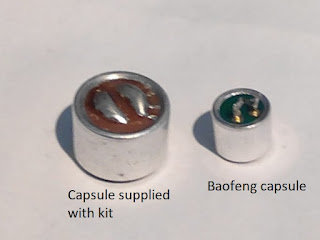
 The UBITX kit comes with an electret microphone capsule (with built-in FET) and a small push switch for the PTT. Some folks have designed and 3D-printed their own microphone housings, but I do not have my own 3D printer. Another possibility is to use a cheap Chinese speaker-mic such as the Baofeng, which can be bought on ebay. Apparently, some of the really cheap ones may be B-grade or cheap knock-offs. I decided to buy a genuine branded Baofeng microphone on the basis that getting a cheap unbranded version of an already cheap microphone may be an economy too far! The photo below shows what the Baofeng microphone looks like inside. I decided to replace the capsule with the one supplied with the UBITX kit, purely on the basis that it is bigger, so probably better. I would be interested in hearing from anyone that has done a more scientific comparison!
To fit the bigger microphone capsule I had to remove the speaker. The photo shows how the replacement capsule was wired to the PCB and fixed with hot melt glue.
Note that during the testing I found that the microphone sounded better with a little bit of wadding stuffed in the housing to remove any resonance. I cut off the supplied dual plug and replaced it with a single stereo 3.5mm plug. The wiring diagram for the modified microphone is shown below, along with the original wiring. The Baofeng microphone has a chip capacitor in parallel with the microphone capsule. I have not measured it, but suspect it is a fairly low value, included for EMC filtering rather than audio shaping.
Disclaimer: This is my personal blog. Views expressed in my posts are my own and not of my employer. The information provided comes with no warranty. I cannot be held responsible for the content of external websites. Any practical work you undertake is done at your own risk. Please make health and safety your number one priority.


Thanks for this write up. I just wired up my Baofeng microphone sort of like yours. My wire colors were different than yours. My ground was a blue wire and my PTT was yellow. I wonder if it's possible for them to use crappier wire, it's way too delicate. I also don't know the last time I've used wire that the insulation could be melted off like this. I'll be checking out the other blog post once I decide to boost the transmit.
ReplyDeleteGlad you found the article useful. I replaced the Baofeng microphone insert with the larger one which came with the UBITX kit. I probably reused the thin wires that came from the Baofeng mic.
DeleteI replaced the little Baofeng microphone element too. It took me a couple of months to get around to this, so no telling when I'll get around to upping the drive.
Delete